

Short answer: To manage multiple devices in a homelab, give every device a consistent name and a reserved IP address, record each one in a single inventory document, put all your services on one dashboard with uptime alerts, update machines on a schedule (automated with a tool like Ansible once you pass a few boxes), reach everything through SSH keys and a mesh VPN such as Tailscale or WireGuard, connect critical gear to one UPS with coordinated NUT shutdown, back up your configurations as well as your data, and follow a short weekly and monthly maintenance routine.
That’s the whole system. The rest of this guide shows you how to build each piece so it fits with the others.
Every homelab starts the same way: one box, one purpose, zero problems. Then you add a NAS. Then a mini PC for Docker. Then a Raspberry Pi for DNS, a managed switch, maybe a Proxmox host. Somewhere around device four, things start slipping. You can’t remember which IP the Pi got. Two machines are named ubuntu. One container host hasn’t been updated since spring. And you find out your backup server has been offline for three weeks only when you need a backup.
None of that is a hardware problem. It’s a management problem, and it has a fairly boring, very reliable fix: a small set of habits and tools that work together.
Who this is for: people running roughly 2 to 10 devices at home (servers, a NAS, mini PCs, Raspberry Pis, a switch or two) who are comfortable in a terminal but don’t want enterprise-grade complexity.
The homelab management system at a glance
Here’s the full system in the order you should build it. Each step makes the next one easier.
| Step | What you set up | The problem it solves |
|---|---|---|
| 1 | Naming convention + IP address plan | “What’s that machine called, and where is it?” |
| 2 | One inventory document (single source of truth) | Forgotten IPs, passwords, ports and roles |
| 3 | Dashboard + uptime monitoring with alerts | Devices silently down for weeks |
| 4 | An update routine, automated when it pays off | Update fatigue across machines |
| 5 | SSH keys, SSH config and a mesh VPN | Per-device remote access hacks |
| 6 | Out-of-band options for when the OS won’t answer | Frozen machines you can’t reach |
| 7 | One UPS with coordinated shutdown (NUT) | Ugly shutdowns and corrupted data in outages |
| 8 | Labeled ports and a tidy network layout | Cable spaghetti, “which port is which?” |
| 9 | Config backups + a maintenance rhythm | Rebuilding from memory after a failure |
You don’t need to do all nine this weekend. Steps 1 to 3 alone will remove most of the chaos.
Step 1: Create a naming convention and an IP address plan
Why start here? Because every other tool you add (the dashboard, monitoring, SSH config, Ansible inventory) refers to devices by name or IP address. If those are random, everything built on top of them is fragile.
Pick a naming convention you’ll actually keep
Good homelab names tell you what the device is and what it does, not what you felt like calling it that day. A simple pattern works well:
<role>-<number> or <type>-<role>-<number>
Examples:
pve-01: first Proxmox VE hostnas-01: main NASpi-dns-01: Raspberry Pi running DNSdocker-01: mini PC running containerssw-core: main switchups-01: the UPS (yes, it gets a name too if it has a network card)
Rules that keep it clean:
- Lowercase letters, numbers and hyphens only. No spaces or underscores.
- Name by role, not by brand. When you replace the hardware, the name can carry over.
- Use the same name everywhere: hostname, router’s DHCP list, dashboard, inventory, SSH config.
Fun names (planets, anime characters) are fine if you love them, but pair them with a role tag in your inventory. “Saturn” tells future-you nothing at 2 a.m.
Give every device a predictable IP address
Should homelab devices use static IPs or DHCP reservations? For most home setups, DHCP reservations are the easier choice. You tell your router “this MAC address always gets this IP,” and you keep one central place to change things. Set true static IPs on the device only for infrastructure that must work even if the DHCP server is down, such as your router, your DNS server, or a hypervisor host.
Then group addresses into blocks so the number itself tells you something. For example, on a 192.168.1.0/24 network:
| Range | Use |
|---|---|
| .1 | Router / gateway |
| .2 – .9 | Network gear (switches, access points, UPS card) |
| .10 – .29 | Servers and hypervisors |
| .30 – .49 | Storage (NAS) |
| .50 – .69 | Raspberry Pis and small service boxes |
| .70 – .99 | VMs and containers that need fixed addresses |
| .100 – .250 | Normal DHCP pool (phones, laptops, guests) |
Your exact ranges don’t matter. Having ranges, and writing them down, does.
Bonus: if you run local DNS (Pi-hole, AdGuard Home, or your router’s DNS), add a record for each device name. Then you type nas-01 instead of an IP address, and the IP plan becomes something you rarely think about.
Step 2: Keep one inventory document as your single source of truth
The most useful homelab tool costs nothing: one document that lists every device. A spreadsheet, a Markdown file in a Git repo, or a notes page all work. What matters is that there’s exactly one, and you update it every time you change something.
What to record for each device
Copy this template and fill in one row per device:
| Field | Example |
|---|---|
| Name | nas-01 |
| Role | Main storage, SMB shares, backup target |
| Hardware / model | 4-bay NAS (your actual model) |
| OS / firmware version | TrueNAS (record the version you run) |
| IP address + how it’s assigned | 192.168.1.30, DHCP reservation |
| MAC address | (from the router’s client list) |
| Services and ports | Web UI on its HTTPS port, SMB 445, NUT client |
| Where credentials live | “Password manager entry: nas-01 admin” |
| Physical location / switch port | Shelf 2, switch port 4 |
| Power | UPS outlet 3, shuts down at low battery |
| Backups | Config exported monthly to Git; data replicated to offsite |
| Notes / last change | “2026-10-12: replaced drive bay 2” |
Two important rules:
- Never store actual passwords in the inventory. Record where the credential lives (your password manager entry name). Keep the secrets themselves in a password manager such as Bitwarden, Vaultwarden or 1Password.
- Record the “why,” not just the “what.” “Port 8443 open because the UniFi controller needs it” saves you from closing it later and breaking something.
If you’re running a NAS server, the “services and ports” column is where most of your future troubleshooting answers will come from. Write it down while you still remember.
When a spreadsheet stops being enough
If your lab grows into dozens of VMs, VLANs and patch cables, look at NetBox, an open-source IPAM and DCIM tool built for data centers. It can track devices, VMs, IP ranges, racks and even power outlets, and it has a REST and GraphQL API for automation. The tradeoff: data entry is mostly manual and the interface has a learning curve. For 3 to 10 devices, a well-kept spreadsheet usually wins.
Step 3: Get central visibility with a dashboard and uptime alerts
How do you know if a homelab device is down? Without monitoring, you usually don’t, until you need it. This step fixes “one device silently down for weeks.”
A start page for every service
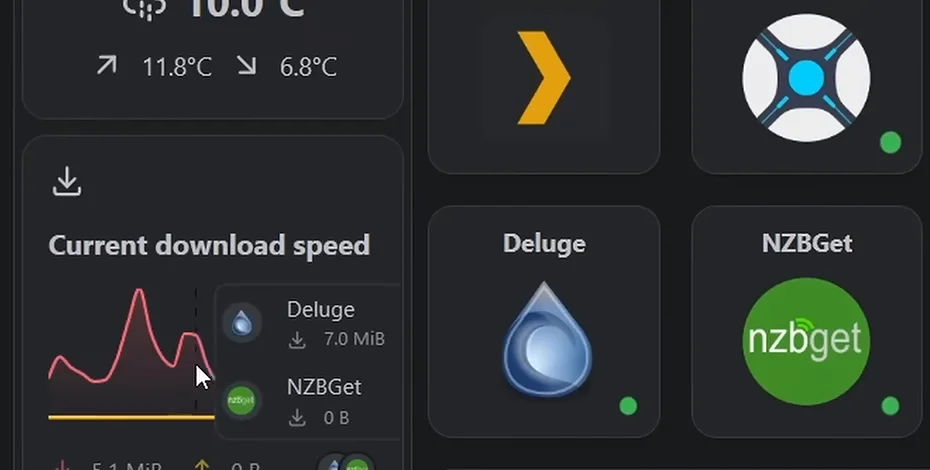
A homelab dashboard is a single web page with a link (and often a live status) for every service you run. Popular self-hosted options include Homepage (gethomepage.dev), Dashy, Homarr and Heimdall.
Homepage is a good default for a multi-device lab because:
- It’s configured with simple YAML files, so the config is easy to back up.
- It integrates with Docker to show container status and stats, and it can discover services automatically from Docker labels.
- It has service widgets for a large number of popular self-hosted apps, so you can see things like download queues or storage use without opening each app.
Set it as your browser’s home page. Organize it by device or by function, and use the same names as your inventory.
Uptime monitoring that actually tells you something
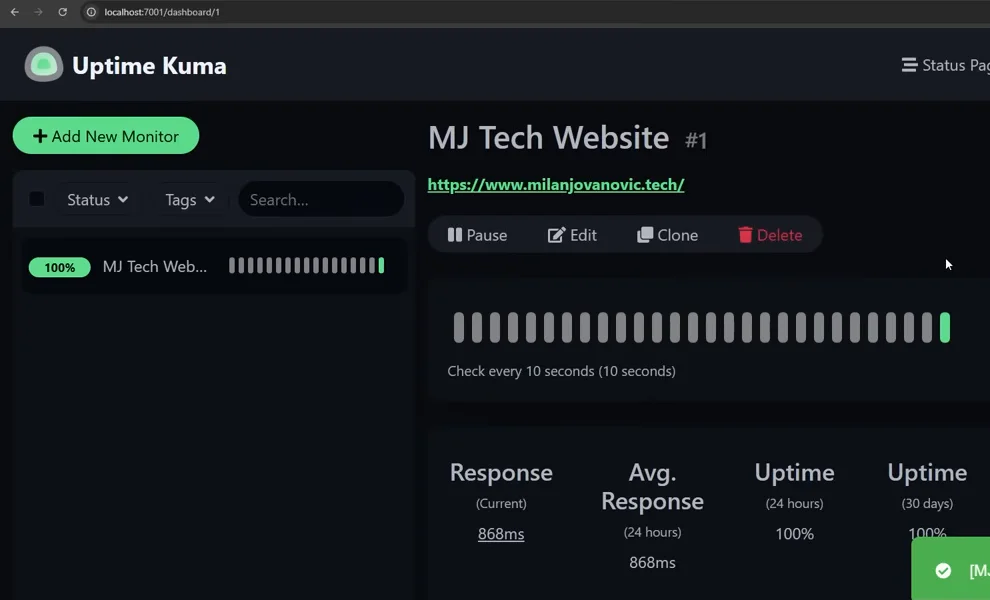
A dashboard shows status when you look at it. Monitoring tells you when you aren’t looking. Uptime Kuma is the go-to self-hosted choice for small labs. It can check HTTP(S) endpoints, TCP ports, ping, DNS, and Docker containers, and it supports “push” monitors, where a script (like a nightly backup job) checks in with Uptime Kuma when it finishes. If the check-in doesn’t arrive, you get alerted.
What to monitor first:
- Ping each physical device (is it alive?).
- HTTP(S) check on each important web UI (is the service actually working?).
- Push monitor on every backup job (did last night’s backup really run?).
- TCP port checks for non-web services like SSH or SMB.
Then set up notifications. Uptime Kuma supports many channels (email, Discord, Telegram, ntfy, Slack and more). Pick the one you’ll actually see on your phone.
One catch: if Uptime Kuma runs on the same box that fails, nobody tells you. Either run it on a different device than your main services, or have a second, lightweight check watch Uptime Kuma itself.
Want deeper metrics (CPU, disk, temperatures over time)? Netdata, or Prometheus with Grafana, are the next step. Most labs with fewer than 10 devices don’t need them on day one.
Step 4: Update everything without the pain
Update fatigue is real. Logging into six machines one by one to run updates is exactly the chore that gets skipped, and skipped updates are how labs end up both insecure and fragile.
Set a routine first, then automate
A simple, sane approach:
- Security patches: on Debian and Ubuntu, enable
unattended-upgradesso security updates install automatically. - Everything else: do a scheduled manual pass (for example, every other weekend) where you update, reboot if needed, and confirm services came back.
- Stagger critical boxes. Don’t update your DNS server, your NAS and your hypervisor in the same 10 minutes. If something breaks, you want to know which change did it.
- Snapshot before big updates on VMs and on hypervisors that support it.
Use Ansible once you have more than a few Linux machines
Ansible is the most common way homelabbers update and configure many machines at once. It’s agentless: it connects over SSH, which you’ll set up in Step 5 anyway. You write a short “playbook” describing what should happen (for example, “run apt update and upgrade on every server”) and run it against an inventory file that lists your devices, using the same names from Step 1.
Why it fits a homelab:
- One command updates everything in your inventory, or just one group, like
[pis]or[docker_hosts]. - Playbooks are repeatable. Running the same playbook twice gives the same result, so you can rerun it safely.
- It doubles as documentation. Your playbooks become a written record of how each machine is set up, and they can rebuild a machine after a failure.
- Secrets can be encrypted with Ansible Vault instead of sitting in plain text.
Start small. One playbook that updates every Debian/Ubuntu box is enough to justify learning it.
Central views for Proxmox and Docker
- Proxmox: if you run more than one Proxmox VE host, or Proxmox Backup Server alongside it, Proxmox Datacenter Manager (stable 1.0 released in late 2025) gives you one interface for multiple remotes, including a central update panel that shows available updates across Proxmox VE and Proxmox Backup Server hosts and lets you apply them from there. A single Proxmox host doesn’t need it.
- Docker: Portainer lets you see and manage containers across several Docker hosts in one web interface. For updates, keep your
docker-compose.ymlfiles in one folder (or a Git repo), pin image versions you care about, and update deliberately withdocker compose pullfollowed bydocker compose up -d, so you can roll back if a new image misbehaves.
Step 5: Set up remote management you can trust
Remote access is where many labs collect bad habits: a port forward here, a password login there, a different trick for every box. Replace all of it with two things.
SSH keys and an SSH config file
- Create one SSH key pair on your main computer (an Ed25519 key is the modern default).
- Copy the public key to each server with
ssh-copy-id user@host. - Once key login works, disable password authentication for SSH on each server.
- Create an
~/.ssh/configfile so every device has a short alias:
Host nas-01
    HostName 192.168.1.30
    User admin

Host pi-dns-01
    HostName 192.168.1.50
    User pi

Host pve-01
    HostName 192.168.1.10
    User root
Now ssh nas-01 just works. No remembering IPs or usernames, and the names match your inventory, dashboard and Ansible inventory.
A mesh VPN instead of port forwarding
How do you access your homelab from outside your house? The safest simple answer for most people is a mesh VPN:
- Tailscale builds a private network between your devices on top of WireGuard. Every device connects outbound, so it works without opening ports on your router, and it works even if your internet provider puts you behind CGNAT. Its MagicDNS feature lets you reach devices by name. You can install it on each machine, or install it on one always-on box configured as a subnet router to reach your whole home network, including devices that can’t run Tailscale (like a switch or printer). Its access controls (ACLs) let you limit what each device can reach.
- Headscale is a self-hosted, open-source alternative to Tailscale’s coordination server if you’d rather not depend on Tailscale’s service.
- Plain WireGuard on your router or a small server gives you full control with no third party, at the cost of more manual setup.
- NetBird is another WireGuard-based mesh option with similar homelab use cases.
Whichever you pick, the rule is the same: don’t expose admin interfaces (SSH, Proxmox, NAS web UIs) directly to the internet. Our guide on how to secure a homelab network covers firewall rules and exposure in more depth.
Step 6: Plan for when a machine won’t answer (out-of-band management)
SSH and VPNs only work while the operating system is running. What happens when a box freezes, won’t boot, or is stuck at a BIOS screen? That’s what out-of-band management is for: a way to control a machine that doesn’t depend on its operating system.
In plain language, here are your options, from most to least capable:
- IPMI / BMC (server boards): Many server motherboards and enterprise servers include a small separate management chip, the baseboard management controller. Vendor versions include Dell iDRAC, HPE iLO and Supermicro’s IPMI. They let you power the machine on and off, see the screen, and often mount an install image remotely, all through a separate network port. If your hardware has one, put that port on your inventory with its own name (for example,
pve-01-ipmi). - Intel AMT (vPro business PCs): Many used business mini PCs and desktops with Intel vPro include Intel Active Management Technology, a hardware-level management feature. Once activated, it can provide remote power control and remote keyboard/video/mouse even when the OS is down. MeshCentral, a free, open-source, self-hosted web tool, can manage computers through its own software agent and also use Intel AMT when a machine supports it, giving you web-based remote desktop, terminal and file access in one place. Some users report needing an HDMI dummy plug on headless machines to keep remote KVM working after reboots.
- IP KVM devices: Small add-on boxes that plug into a computer’s video and USB ports give you remote screen and keyboard access to hardware that has no built-in management.
- Smart plugs (the simple fallback): A network-controlled smart plug lets you power-cycle a frozen Raspberry Pi or mini PC remotely. Pair it with the BIOS setting that powers the machine back on after AC power returns (often called “Restore on AC Power Loss” or similar). Don’t use this on a NAS or hypervisor mid-write unless nothing else works, since a hard power cut can corrupt data.
Keep all out-of-band interfaces on your local network or behind your VPN. They are powerful by design, so never expose them to the internet, and change default credentials immediately.
Step 7: Protect everything with one UPS and coordinated shutdown
Power outages are the classic way a tidy homelab becomes a corrupted one. A UPS keeps devices running briefly, but the real goal is a graceful shutdown in the right order before the battery runs out.
How coordinated shutdown with NUT works
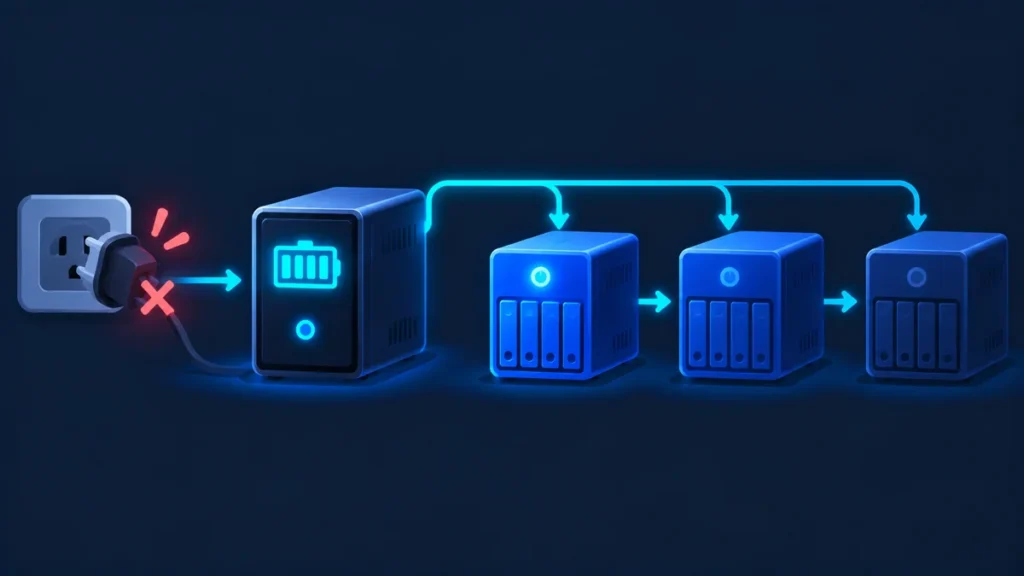
NUT (Network UPS Tools) is open-source software that reads your UPS’s status and tells machines when to shut down. The setup for multiple devices looks like this:
- Connect the UPS to one machine by USB (or use the UPS’s network card if it has one). That machine runs the NUT server and is the one that “talks” to the UPS. A low-power, always-on device like a Raspberry Pi is a popular choice.
- Every other device runs a NUT client (
upsmon) that connects to that server over the network and watches the UPS status. - When the UPS reports on battery and low battery, all clients shut down cleanly, and the NUT server shuts down last.
Many NAS and hypervisor platforms make this easier. TrueNAS, for example, has a built-in UPS service based on NUT that can act as either the server or a client. Proxmox hosts can run the standard nut packages from Debian. Check whether your UPS model is supported by NUT before you buy; most modern USB-connected consumer and small-business units are.
Choose your shutdown order
Not every device should go down at the same time. A sensible order:
- VMs and containers first, then the hypervisor host.
- Docker hosts and app servers.
- The NAS, after everything that writes to it has stopped.
- The NUT server last.
Network gear (modem, router, switch) can usually stay on the UPS until the battery runs out, since it doesn’t need a clean shutdown and keeps your alerts flowing.
Test it. Pull the UPS plug from the wall during a quiet hour and watch what happens. An untested shutdown plan is a guess. Also note which devices should power back on automatically when electricity returns (that BIOS setting again), and record it in your inventory’s “Power” column.
Step 8: Organize the network: labeled ports now, VLANs later
Messy cables aren’t just ugly. They make troubleshooting slow and mistakes likely. You don’t need a rack to fix this.
Label everything physical
- Label both ends of every cable with the device name.
- Label switch ports, or keep a port map in your inventory (“port 4 → nas-01”).
- Keep a consistent layout: for example, servers on the low ports, uplinks on the last ports.
- Add the switch port to each device’s inventory row.
VLANs: a smart later step, not a day-one requirement
VLANs split one physical network into separate virtual networks, so, for example, smart-home gadgets can’t reach your NAS. They’re valuable, but they add complexity, and a broken VLAN setup can lock you out of your own gear. Get Steps 1 to 7 working first. When you’re ready, follow our step-by-step guide to securing a homelab network, which covers VLAN planning and firewall rules in detail.
If you later use VLANs, your IP plan from Step 1 grows naturally: each VLAN gets its own subnet, and each subnet gets a row in your inventory.
Step 9: Back up configurations, not just data
Most homelab owners back up their files. Far fewer back up the setup that makes those files useful. If your Docker host dies, can you rebuild every container with the same settings? If your router resets, do you have its firewall rules?
What “configuration backup” means in practice
| Device / service | What to back up |
|---|---|
| Docker hosts | All docker-compose.yml files, .env files (stored securely) and app config folders |
| Proxmox | VM/container backups (Proxmox Backup Server or built-in vzdump) plus notes on host network config |
| NAS | The NAS’s exported configuration file (most NAS platforms offer one) |
| Router / firewall / switch | Exported config file after every change |
| Dashboard (Homepage etc.) | Its YAML config folder |
| Uptime Kuma | Its data folder or built-in backup |
| Ansible | Your playbooks and inventory, in Git |
| Everything | Your inventory document and SSH config |
A simple pattern: keep a private Git repository (self-hosted with Gitea or Forgejo, or a private repo on a hosted service) for compose files, playbooks, dashboard config and exported device configs. Keep secrets out of the repo, or encrypt them (Ansible Vault works here).
Then follow the familiar 3-2-1 rule for data: three copies, on two kinds of storage, with one copy offsite. Your NAS is a great backup target, but it isn’t a backup of itself. If you’re choosing NAS drives, remember that redundancy like RAID or ZFS mirrors protects you from a drive failure, not from deleted files, ransomware or a house fire.
Finally, test a restore at least occasionally. A backup you’ve never restored is a hope, not a plan.
The homelab maintenance rhythm: weekly, monthly, quarterly
Tools only help if you look at them. This lightweight schedule keeps a multi-device homelab healthy without eating your weekends.
Weekly (about 10 minutes)
- Glance at your dashboard and Uptime Kuma. Anything red or flapping?
- Check that every backup push monitor reported in.
- Review alerts you dismissed during the week.
Monthly (about an hour)
- Run your update routine or Ansible playbook; reboot where needed and confirm services return.
- Update Docker containers deliberately, one stack at a time.
- Export fresh configs from your router, switch and NAS; commit changes to Git.
- Check disk health (SMART status) and free space on the NAS and hosts.
- Update your inventory with anything that changed.
Quarterly (an afternoon)
- Test a real restore of one VM, one container stack and a few files.
- Run a UPS shutdown test.
- Review your SSH keys, VPN devices and accounts; remove anything you no longer use.
- Read through your inventory: still accurate? Any device you could retire?
Put these on a calendar. It’s the habit, not the tooling, that keeps a lab from drifting back into chaos.
Putting it all together: what “managed” looks like
When the system is in place, a typical day looks like this:
- You open your browser and the dashboard shows every service, organized by the same names used everywhere else.
- Uptime Kuma pings your phone the moment something goes down, including last night’s backup job if it didn’t check in.
- You type
ssh docker-01from a coffee shop over Tailscale or WireGuard, with no port forwards and no passwords. - One Ansible command patches every Linux box, and Proxmox Datacenter Manager or Portainer gives you the hypervisor and container view.
- A storm knocks out power, and NUT shuts everything down in order while you sleep.
- A drive dies, and your inventory, Git repo and backups turn a disaster into a two-hour rebuild.
That’s how you manage multiple devices in a homelab: not with one magic tool, but with a handful of simple ones that share the same names, the same source of truth, and the same routine.
Your next step: pick the one pain point that bugs you most (forgotten IPs, surprise outages, or update fatigue) and do that step this weekend. Then come back for the next one. If you’re still planning your setup, start with our homelab guide, and before opening anything to the outside world, read how to secure a homelab network.
Frequently asked questions
What is the easiest way to keep track of all my homelab devices?
Use one inventory spreadsheet or notes document with a row per device: name, role, IP address, MAC address, services and ports, where its credentials are stored, switch port, UPS outlet and backup method. Pair it with a consistent naming convention and DHCP reservations so names and addresses rarely change.
Should I use static IPs or DHCP reservations in a homelab?
For most devices, DHCP reservations are easier because you manage every address in one place on your router. Use true static IPs only for core infrastructure that must work even when DHCP is unavailable, such as your router, DNS server or hypervisor host.
What is the best dashboard for a homelab?
There’s no single best, but Homepage, Dashy, Homarr and Heimdall are popular self-hosted options. Homepage is a strong choice for multi-device labs because it’s configured in YAML, shows Docker container status, and has widgets for many self-hosted apps.
How do I get alerted when a homelab server goes down?
Run a monitoring tool such as Uptime Kuma. Add ping, HTTP(S) and port checks for each device and service, add push monitors for backup jobs, and connect a notification channel you’ll see on your phone, such as email, Telegram, Discord or ntfy. Host the monitor on a different device than your main services.
How do I update multiple Linux servers at once?
Enable automatic security updates (for example, unattended-upgrades on Debian and Ubuntu), then use Ansible to run updates across all servers with one playbook. Ansible connects over SSH, needs no agent on the servers, and uses an inventory file of your devices.
How can I access my homelab remotely without port forwarding?
Use a mesh VPN such as Tailscale, Headscale, NetBird or a self-run WireGuard setup. Tailscale connects devices outbound, so it works without opening router ports and even behind CGNAT. Keep admin interfaces off the public internet.
What is out-of-band management in a homelab?
Out-of-band management is a way to control a computer that doesn’t depend on its operating system, so you can power it on, reboot it or see its screen even when it’s frozen. Examples include IPMI/BMC on server boards, Intel AMT on vPro business PCs (often used with MeshCentral), IP KVM devices, and, as a basic fallback, smart plugs for remote power cycling.
How do I shut down all homelab devices safely during a power outage?
Connect your UPS to one machine running a NUT server, and run NUT clients on every other device. When the UPS reports low battery, clients shut down first (VMs, app servers, then the NAS) and the NUT server shuts down last. Test the process by unplugging the UPS during a quiet period.
Do I need VLANs to manage a homelab?
No. VLANs improve security and separation, but they add complexity. Get naming, documentation, monitoring, updates, remote access and power protection working first, then add VLANs as a planned later step.
What should I back up besides my data?
Back up configurations: Docker compose files, app config folders, Proxmox VM backups, NAS and router configuration exports, dashboard and monitoring configs, Ansible playbooks, your SSH config and your inventory document. Store them in a private Git repo with secrets excluded or encrypted.